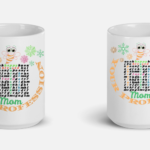
How to make a product mockup for free
If you do not have a blank mug, you can create a blank design and put on a mug on your POD company website and download the PNG images.
This process allows you to have a blank mug you can save and then put your design on it to make product images.
The whole process is explained in the video.
We first created a blank mug design.
It is uploaded to the POD company website and put on a mug.
We downloaded mug images as PNG.
Then we used Inkscape to put our design on the mug.
We also took background pictures.
You then use the background pictures and the mug images to create product images for the mug design to list.
That’s a transparent product blank and put your design on it.
Use Layer>Blend mode>multiply to blend the design into the product.
Save.
If the product came with a background you don’t want to use, use remove.bg to remove it.
You could also take picture of a blank product in the environment you want to keep as background. And once you put the design on the product, you don’t need to put the product in a background.
Save the product with the design on it as PNG with not background if a background will be added.
Alternatively, you can add the transparent product blank in the background images you took and clipped and save. That way once you add the design on the product, you save and have the product image to list the product with.
Add background to make product image
In Inkscape,
File>document properties> change the unit to pixels.
Change the number to the size you want. Like 320px by 320px (96 dpi) or 1,000 px by 1,000px at 300 dpi if that is the size of the background you will work with.
Close the document properties.
Add layers
On layer 1 add the background.
On layer 2, add the product with the design on it.
The product is the same size as the background.
With Shift and CTRL keys held, drag the angles arrows to reduce the size to your liking.
Use CTRL key and move the product like the mug to sit on the flat surface in the background picture.
If you like the position of the mug, select the background image and click File>Export and export selection.
You could select the page instead of selection if you position the background image in the page and align it.
How to make 640px wide image when starting with 320*320px image?
Position the mugs.
Select them.
Align relative the last selected and center horizontal axis.
That will line their height.
Object>group.
With SHIFT + CTRL held, drag the corner to increase the size of the mugs or drag in to decrease.
Position where you want in the background while holding CTRL key.
Save the background as PNG and save selection.
Save to have a copy.
Crop The image to 640px w by 320px Height
Add a layer on top.
Lock the bottom layers.
Add a rectangle to the layer on top.
Unlock the padlock to set the rectangle size once you click on the selection tool to select the rectangle.
Make the rectangle transparent to see through.
No stroke and add fill color and reduce the opacity when you click on the fill color at the bottom of the screen. Set the size to 640px W x 320px H.
Unselect the layer and align the rectangle on the background.
Duplicate the rectangle and move to the side.
Duplicate the images and move to the side.
These duplicated image and rectangle can be used to make other product images if desired.
Select all (the background, image, and rectangle).
That is a product image ready to save.
Another variation.
From the duplicated image, background, and rectangle you can create another product image.
Select the reangle and the background.
Select the reangle and the background.
Align relative to the background vertical axis to lie up the edges left and right.
Select all.
Object>clip>set.
Click on Object in the top bar. Click on Group.
Save both product images.
How to make website version of the image clipped?
320px wide. In Inkscape 320px is 96 dpi and that correspond at 1,000px at 300dpi.
Lock the pad.
Select one image.
Change the width to 320px. The height will adjust.
Alternatively, you can clip as above to make 320px by 240px.
How to clip the image to make product images for your website product listings?
Option 1
The rectangle won’t fit the cups. Therefore, select the image and the background and lock the pad. Change the height to 240px.
Put the rectangle on the image.
Align.
Select all (background, image, rectangle).
Click Object>clip>set.
Save the selection as PNG.
Option 2
Alternatively, bring a background of the size 320px by 240px and put the mug on it.
Select all and save the selection as PNG (File>Export image as).
Align relative to the background vertical axis to lie up the edges left and right.


