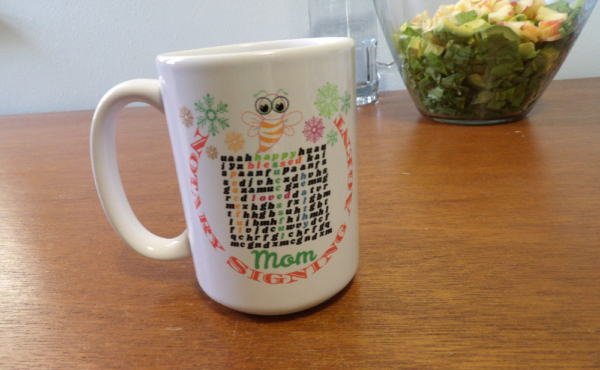
You can make your own video mockup by first making image mockup for your product, then you record a background video and you use a free software Shotcut to place the product image in the background video and save as your POD product video. We used this process to create a mug video mockup.
The 1st option shows how to download an image mockup from your POD company site for your design and use that to create a product video.
Option 2 shows how to take a product image you created and turn it into a product video.
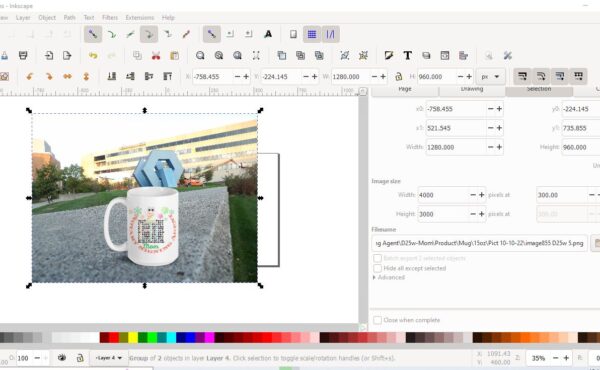
How to make the product image in Inkscape is discussed in 2 prior videos.
This process explains how to put a product image like a mug you previously put a design on, on a background video you previously recorded, to create a product video for your POD product listing.
Make Mug Image in Inkscape
Make the mockup image.

It could be taking a picture of the blank product and put a design on it.
Usually, you make mockup image and video for POD products to keep your inventory low.
If you make the product yourself, you could just print a sample and take pictures then shoot a video. That way you could see how the color is, for real and how your printer print it out. That way you know what to expect when you receive orders.
When you make the image mockup in Inkscape, use multiply in Layer>Blend mode to blend the design color onto the product.
Make sure to save the product image mockup as PNG with no background. That means you use a product blank that has the background removed.
You can remove the background in Inkscape or use remove.bg to remove the background off your product blank.
To learn more on how to create your own mug image mockup using Inkscape for free, we explained the process in both articles: 3-How to create a mug mockup for free and 4-How to create a mug mockup for free.
Open Shotcut
It is a free open-source video software.
Click on Playlist.
Open the product mockup folder.
Open the video mockup.
Drag the video to the playlist.
Drag the mockup image to the playlist.
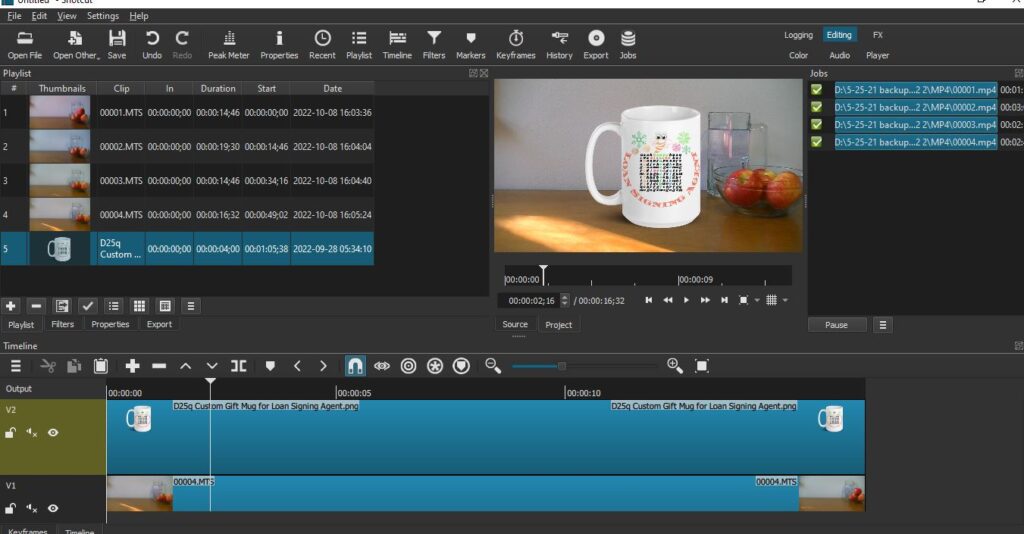
Drag the video down to the timeline.
Right click in the timeline. Click on track operations.
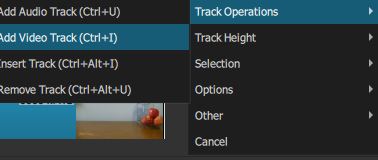
Click on Add video track.
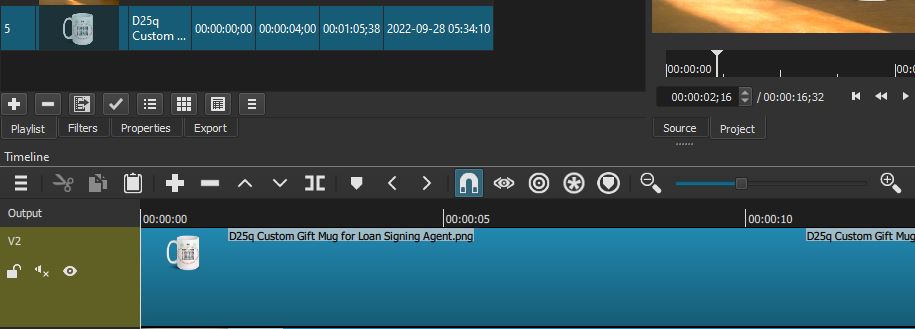
Drag the product image to the top video track line.
Mute all the tracks.
Drag the middle of the image to expand it.
Move the image a little away from the background element or elements in the video. To do that you need to apply a filter.
How to Apply Filters in ShotCut?
Click on the image in the timeline to select it.
Click on filters on top or next to playlist.

Click on + sign to see the filter menus.

Click on video and scroll down to size, position & rotate or type size in the search bar on top to locate it.
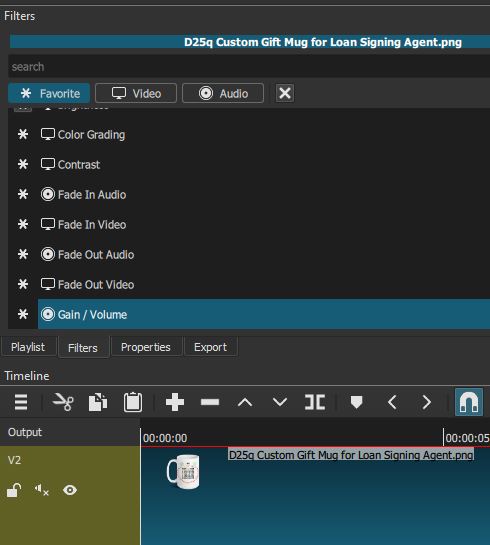
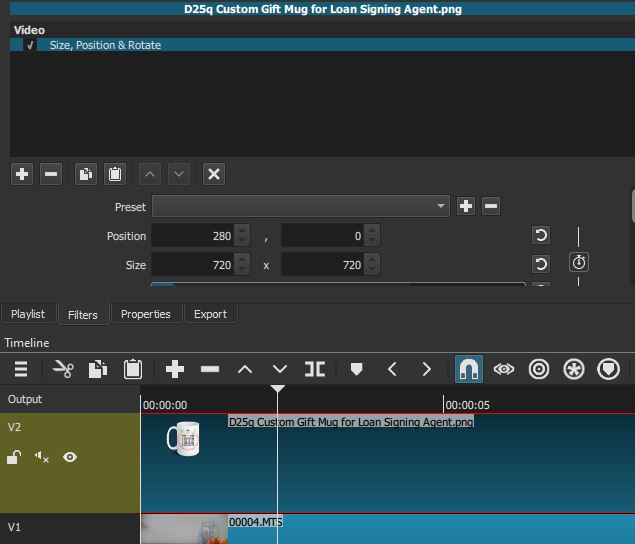
Click on it.
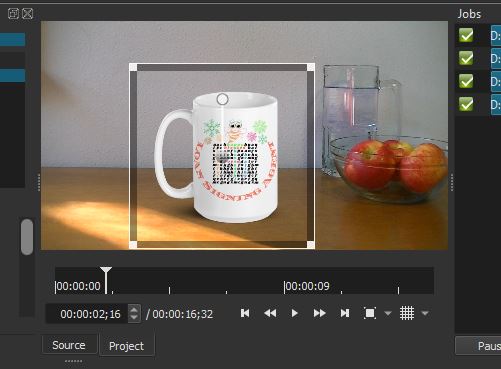
That will put a box around the selected image in the preview window.

Click on preset menu and click bottom left.
Alternatively, grab the round ball in the middle of the box that is around the image in the video and when the mouse is a cross, drag to the left or where you want the image mockup in the video.


Click on playlist.
Add another mug image
Drag the second image mockup to the end of the first one if you want them on the same tack.
Overlap a little to create a fade motion or just move the second image to the end of the first one.
If the product is a little off in color, you can adjust it in filter.
Click the images on the track holing SHIFT key.
Apply Filter
Click on filters.
Click + sign.
If you don’t like a change, click on the yes mark next to the filter menu to revert to the previous state.
You can use the “Hue, Lightness and Saturation” filter to mute the blank mug a little if desired.
I changed the lightness to 98% from 100% and it was ok.
Mute the image track.
Select the second image and drag to match the end of the video track.
How to export a video timeline in ShotCut

Now we can export the timeline.
Select one image and hold SHIFT key and select the other images and release the SHIFT key to hold CTRL key then click on the video track to select the video. That allows you to select both the image track and the video track.
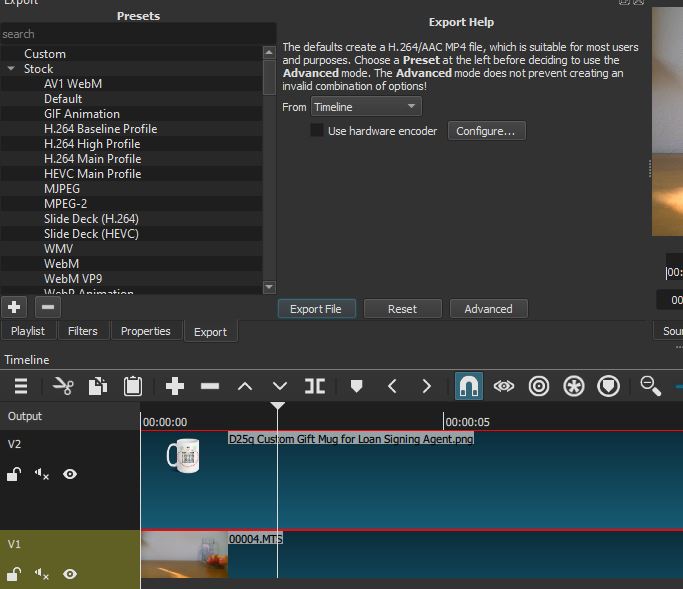
Click on Export on top or next to playlist.
Make sure the timeline is selected in the Export drop down menu in the Export window.

Click on Export File.
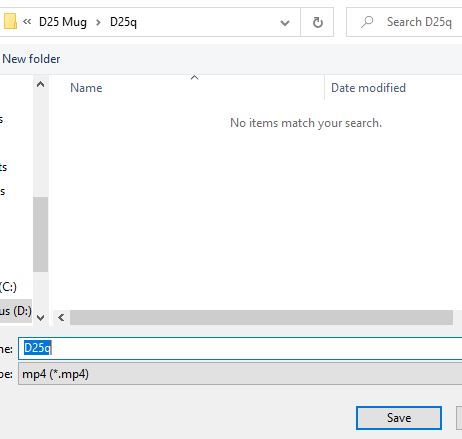
Choose the folder and save the product video.
When it is done in the right corner in the Jobs section, you will see MP4 at the end of the file name.
By default, it saves as MP4.
While it is exporting, you will see % next to the file name in the Jobs window. When it is done you will see MP4 at the end.

There are multiple ways to create your own POD video mockups. We explain few more options. The links to these articles will be in this article to help you decide which option you like better based on its simplicity or to save some time.
